My roommates got married last weekend. Yes roommateS. To each other. Although it would be quite the coincidence of they were getting married to different people.
I didn’t always live with an engaged (and now married) couple though. When I first moved to my current place it was just me and one-half of the couple. I specifically remember when we moved in making a joke about her not getting engaged anytime soon so I wouldn’t have to move. Apparently the joke was on me, because 5 months later she had a ring on her finger. But…I didn’t have to move.
Eight months later the fiancee moved in. But…I didn’t have to move.
Eight months after that, well, they’re married. And…I’m still living here.
I’ll move eventually, but in the meantime, I thought I would make them some cookies.
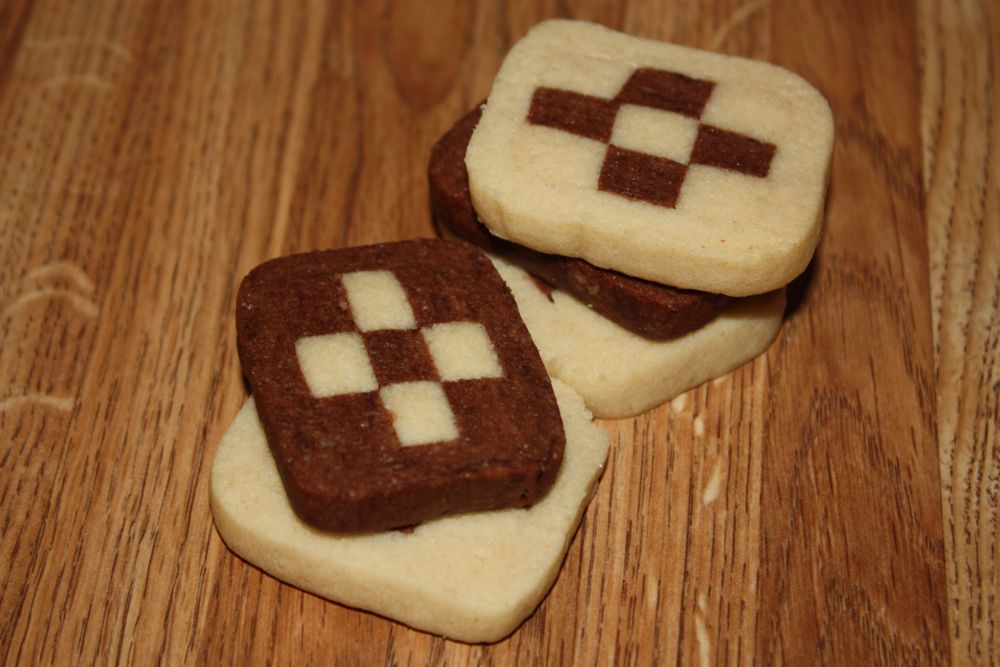
I made some checkerboard cookies because, well, I’ve never made them before and they look pretty cool. They require a certain amount of accuracy with a ruler, but the result is worth the extra effort. It’s like a tasty variation of graph paper. Yum.
Checkerboard Cookies
adapted from Baking Obsession
- 1 cup unsalted butter, softened
- 1 cup granulated sugar
- 5 1/3 cups of flour
- 1 tsp salt
- 1 tsp baking powder
- 1 tbsp vanilla extract
- 2 large eggs
- 1/2 cup cocoa powder
Combine the butter and the sugar and beat until soft and fluffy with an electric mixer. Then, add the eggs one at a time until each is fully combined. Finally, add the vanilla.
In a separate bowl, sift the flour, baking powder, and salt together. Slowly add the dry ingredients the butter mixture. Seriously, slowly. Or else you end up with puffs of flour everywhere.
Mix it until it’s mostly combined. It might look a little crumbly. That’s when I went old school and used my hands to continue mixing it until it all sticks together in a big, coherent, dough blob.
Here’s where the fun part starts.
Divide the dough into two parts. Leave half as is and knead the cocoa powder into the other half. Now we have chocolate dough. This took a while and I kneaded it all with my hands until it was combined well.
Now, take the chocolate blob and the vanilla blob, and divide each of those into two equal parts. So now we have four dough blobs. Take each blob, form it into a rectangle-ish shape, wrap it in some plastic wrap and stick it in the fridge for two hours. I was short on time so I stuck mine in the freezer for about 30 minutes and it seemed to work pretty well.
After the dough has had a chance to firm up a bit, take one blob of the chocolate and one blob of the vanilla out. Roll each kind of dough out to about a 1/4 inch thick, 5 inches wide, and 10 inches long. I rolled my out on wax paper so I didn’t have to worry about the dough sticking. But then the wax paper slid around on the counter. On my second go-around I rolled it out on plastic wrap and it worked much better.
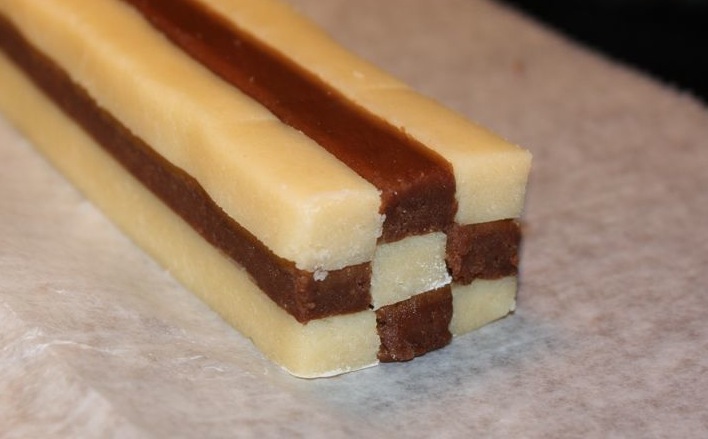
Then, using your trusty ruler (for precision), cut out strips of dough 1/2″ wide and 10 inches long. Cut out 9 strips of chocolate dough and 9 strips of vanilla dough. Stack the strips into a nice checkerboard pattern, until you have two 3×3 rectangles. Wrap those rectangles in plastic wrap keeping the edges straight and the corners fairly sharp and put it back in the fridge (or freezer) to firm up again.
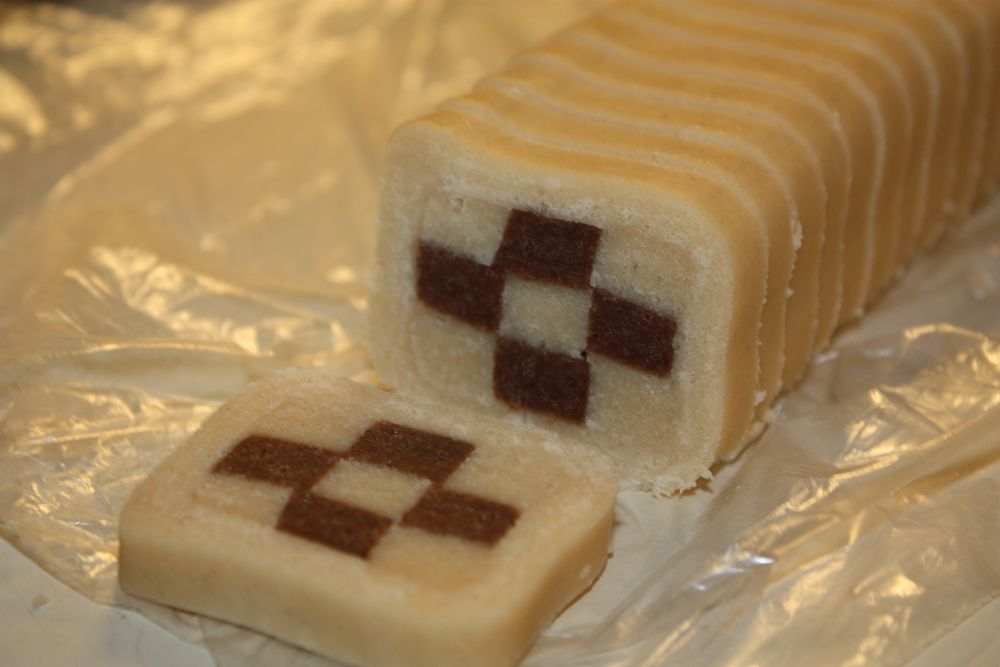
Meanwhile, take out the remaining two blobs of dough that have been chilling. I just unwrapped them from their plastic wrap and since I used enormous pieces to wrap them in, I rolled the dough right out on the same plastic wrap. Roll the dough out to about a 1/4 inch thick and at least 5 inches wide and 10 inches long (or at least bigger than the checkerboard log you just made). When your checkerboard log has chilled, pull it out and place it on your rolled out dough with the long edges parallel. Then, wrap the dough around the log, being sure to keep the square edges (do this slowly to prevent the dough from cracking). Rewrap your dough logs in the plastic wrap and set them to chill (yes, again…I didn’t say this was a quick process).
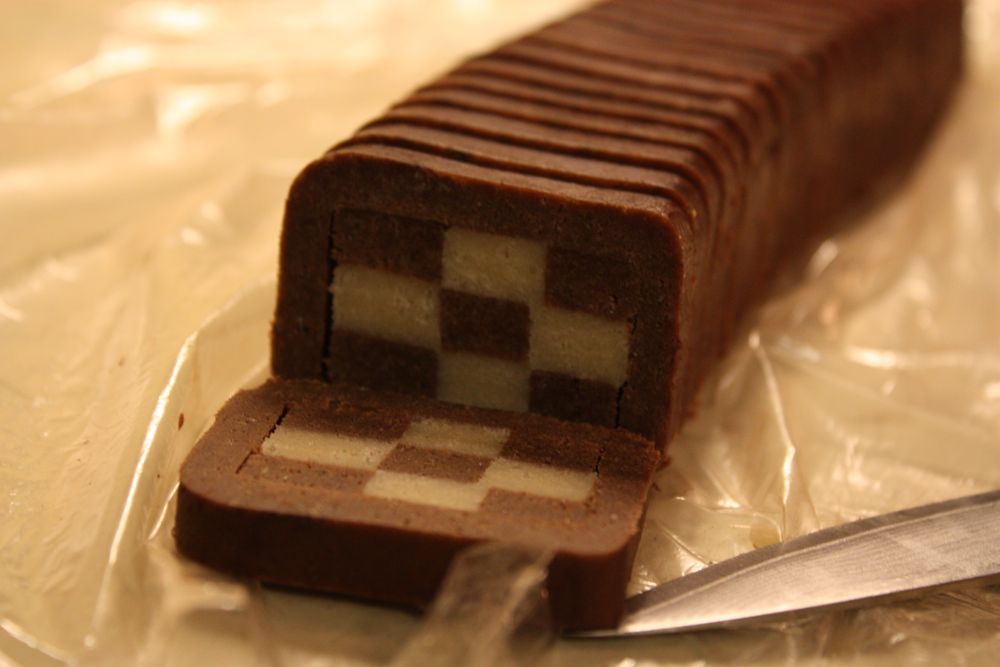
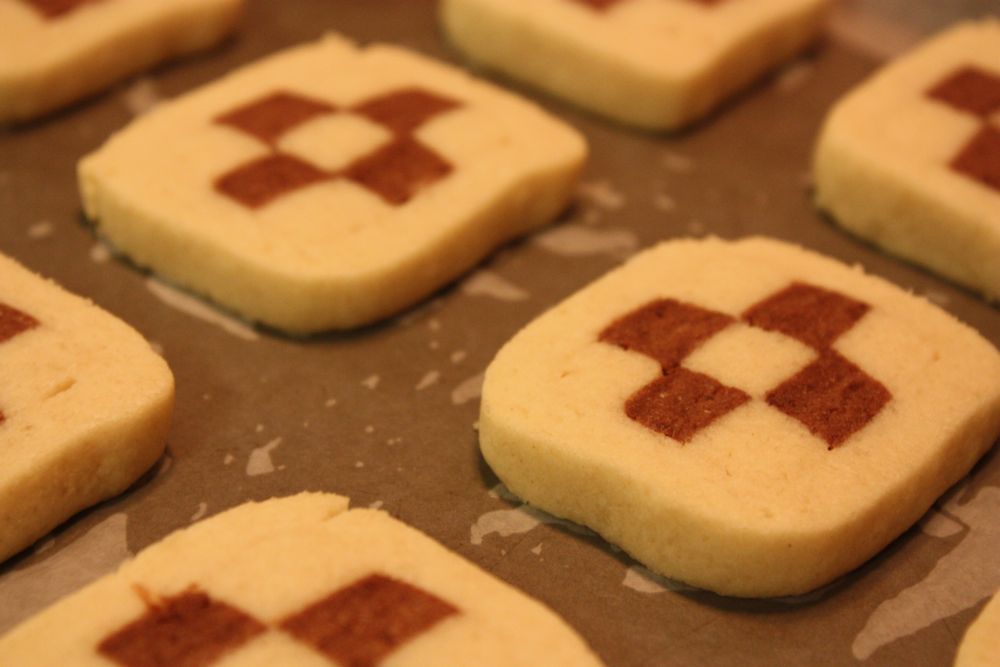
When the dough has chilled (again, about 30 minutes in the freezer did the trick for me), take it out and unwrap it. Slice the logs into 1/4 inch slices and place about an inch apart on a cookie sheet covered with parchment paper. The cookies didn’t spread too much while baking.
In an oven preheated to 350°, bake for 10-12 minutes until the bottoms are lightly brown.
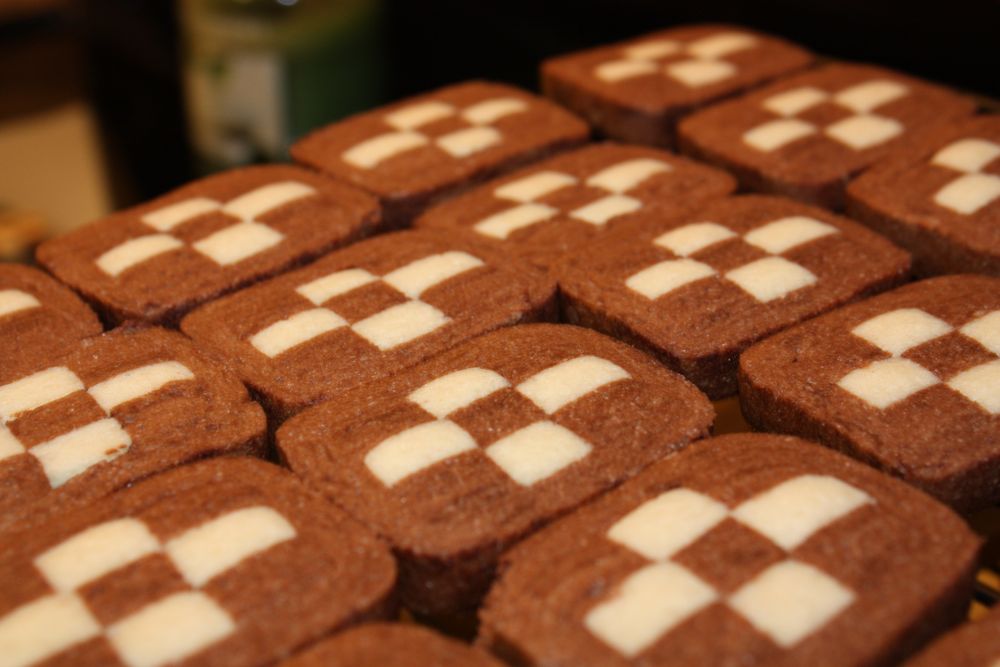
Let them cool on a rack for 10-15 minutes and then devour.

Comments
Great, I never knew this, thanks.
Pingback: White Chocolate Macadamia Nut Cookies @ simmiecakes
YUMMY. Your creations are beautiful and look delicious. I want all of it right now!
loves them!